Adding beauty
is in our nature.

Mountain Biking Preparation: 1- Physical Fitness
 Any cyclist who regularly rides on flat terrain is used to hills and undulating circuits.
But the mountains are something else entirely in terms of intensity and duration of effort.
Voici quelques conseils pour vous préparer spécifiquement à la montagne. Un séjour cyclo réussi au Chalet La Source, mérite bien quelques semaines de préparation !
Prioritize quality over quantity
La base de départ, c’est le foncier : des sorties longues, une alimentation qui limite les apports de gras et de sucres rapides. On obtient déjà un rapport poids/puissance correct pour attaquer la préparation spécifique.
L’entraînement spécifique montagne : au moins un mois avant les ascensions de cols, on attaque progressivement de 2 à 4 séances par semaine, en laissant au moins un jour de récupération entre deux séances intensives, et en alternant les thèmes (force, seuil, vélocité, changement de rythme). On commence toujours les séances par un échauffement, pour terminer par une récupération au calme.
 Le travail de force consiste typiquement, sur un parcours vallonné, à monter toutes les bosses en surbraquet, à 45-60 rpm, sans augmenter significativement la fréquence cardiaque (i2). On reste assis le plus possible pour faire travailler uniquement les jambes, et on se concentre sur sa technique de pédalage.
Le travail au seuil, vise repousser le plus possible le seuil anaérobie, seuil à partir duquel l’organisme produit plus d’acide lactique qu’il ne peut en éliminer (c'est pourquoi on parle aussi de seuil lactique). Typiquement, ce sera l’allure d’un contre-la-montre, intermédiaire entre endurance et effort court : un tempo soutenu avec forte ventilation mais sous contrôle. On le travaille par des séries en zone i4.
 Le travail de vélocité (capacité à « mouliner ») permet de maintenir une bonne oxygénation des muscles et élimination de l’acide lactique.
For example, we will repeat several times a small loop composed of several hills, at a high cadence (90 rpm or more) and in effort zone i2. As the objective is to maintain the pace over time, we will work more on "long cadence".
Le changement de rythme (« vélocité courte ») se travaille grâce aux exercices de fractionné inspirés de l’athlétisme. Il s’agit d’alterner en côte des phases courtes en i1/i2 et des accélérations en i4/i5, ceci en position assise ou en effectuant des transitions assis / danseuse.
Ces séances s’accompagnent d’exercices techniques en montée comme en descente.
To illustrate, here are some examples of sessions (see the definitions of effort zones at the end of the article):
|
Type of effort |
Cadence |
Exemple d'exercice |
Exemple d'exercice |
|
Strength |
Overgear |
2 séries de 5 x 1 min (i2), |
3 séries de 5 min (i2) |
|
Threshold |
80 rpm |
5 sets of 4 minutes (i4), 4 minutes recovery |
3 séries de 10 min (i4) |
|
Velocity |
90-100 rpm |
3 sets of 10 minutes at 90-100 rpm (i2), 10 minutes recovery |
2 sets of 30 minutes at 100 rpm or more (i2), 15 minutes recovery |
|
Fractionated |
seated 80-90 rpm, dancer 70-80 rpm |
2 séries de 5 x 15 sec (i5) |
3 séries de 5 x 30 sec (i5) |
General Physical Preparation (GPP)
 To optimize your cycling training, nothing beats a good general physical preparation (GPP). The best strength training exercises for cyclists are as follows:
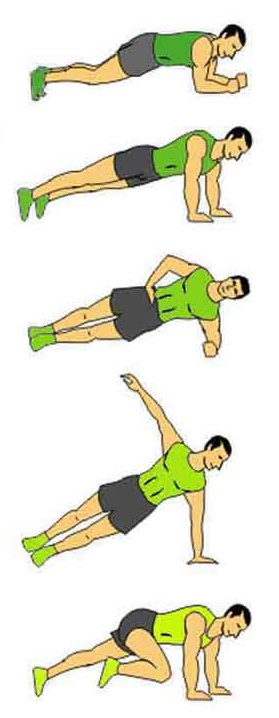
Les exercices de gainage, pour renforcer le dos et les abdos. Un bon gainage évite les mouvements parasites (épaules qui bougent, bassin qui tourne…) et améliore le rendement du pédalage.
⇒ Planche (ventrale et latérale), chaise, superman/woman, crunch, rameur…
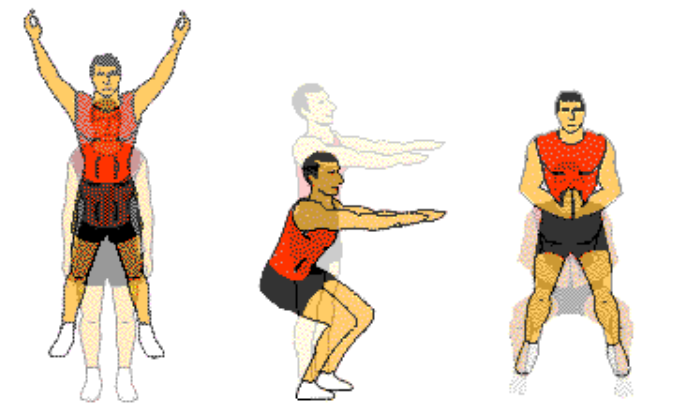
Les exercices pour renforcer les fessiers, et les cuisses.
⇒ Squats, fentes, escaliers, montée sur les mollets …
 Les exercices de pliométrie pour travailler l’explosivité, et être ainsi plus à l’aise dans les changements de rythme sur le vélo.
⇒ Squat jumps, box jump, fentes sautées
Enchaîner ces exercices sous forme d’ateliers, type circuit training, avec 30 secondes d’exercice suivies de 30 secondes de repos.
Monitoring tools to help you make progress
Les sensations seules peuvent être trompeuses. En permettant de mettre en relation les sensations personnelles et les données objectives, le monitoring apprend à mieux se connaître, mesurer ses progrès, et contrôler son effort lors d’une ascension.
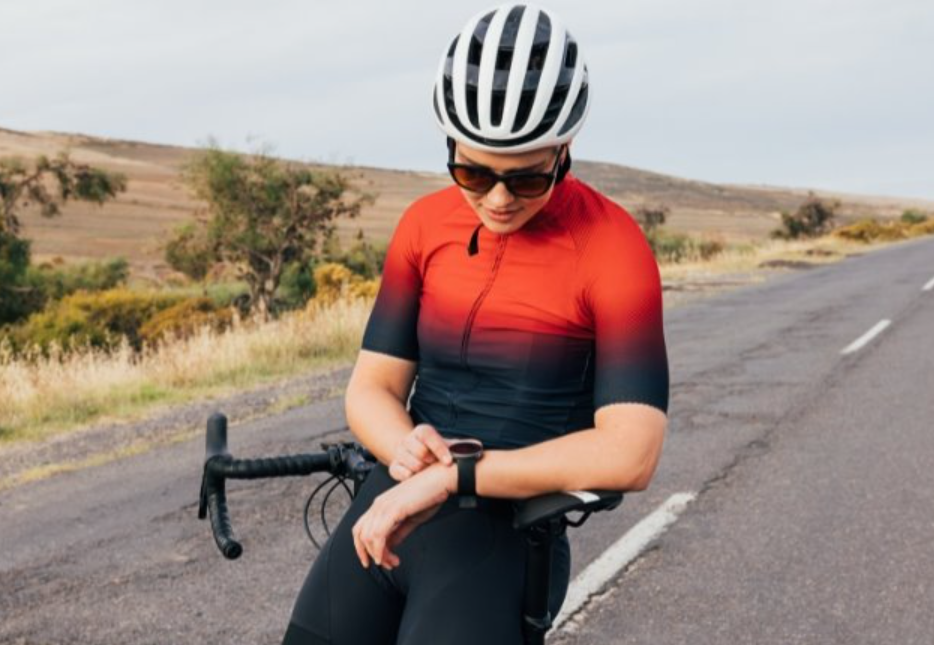 Le cardiofréquencemètre est l’outil de base, la fréquence cardiaque étant en lien direct avec l’oxygénation musculaire.
Le capteur de puissance, de plus en plus populaire, ajoute un plus en permettant de s'affranchir des paramètres externes qui ont une répercussion sur le rythme cardiaque d’un sportif : chaleur, stress, fatigue, hydratation…
Effort zones in cycling
|
Area |
Intensity |
% FCM |
Type of effort – Perceived effort – Maximum duration of effort for an average level |
|
i1 |
Lightweight |
< 75% |
Récupération active : |
|
i2 |
Average |
75-85% |
Endurance : |
|
i3 |
Supported |
85-92% |
Rythme : |
|
i4 |
Critical |
92-96% |
Seuil : |
|
i5 |
Over- |
96-100% |
Tolérance : |
|
i6, i7 |
Max |
100% |
Sprint : |
Good development: adapting the gears to your level
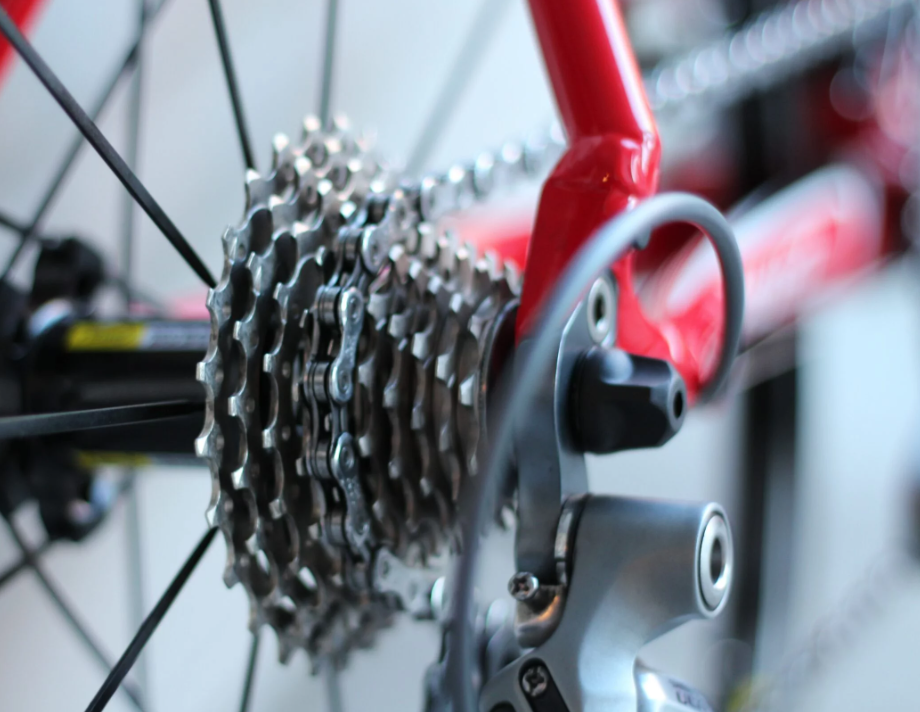 Evaluez les développements qu’il vous faut pour les ascensions difficiles (pentes supérieures à 10%), en mesurant la cadence - et donc la vitesse - que vous pouvez maintenir, votre « zone de confort ».
Pour cela, il faut vous tester dans une bosse bien régulière.
En pratique, pour passer partout un rapport 1:1 constitue une bonne garantie (dans l’exemple ci-dessus : 34x34). En tous cas, il faut prévoir de la marge pour affronter les passages plus rudes.
For example, for a 34-tooth chainring / 28-34 sprockets, here are the speeds obtained for cadences of 70 to 90 rpm (on a standard 700x25 wheel):
|
Cadence |
Vitesse en km/h selon le développement |
|||
|
34x34 |
34x32 |
34x30 |
34x28 |
|
|
70 rpm |
8.9 |
9.4 |
10.0 |
10.7 |
|
80 rpm |
10.1 |
10.8 |
11.5 |
12.3 |
|
90 rpm |
11.3 |
12.1 |
12.9 |
13.8 |
And now, have a good training session, and see you in the next article for the second part of Mountain Bike Preparation: Technique...
A très bientôt au Chalet La Source !
![]()
